
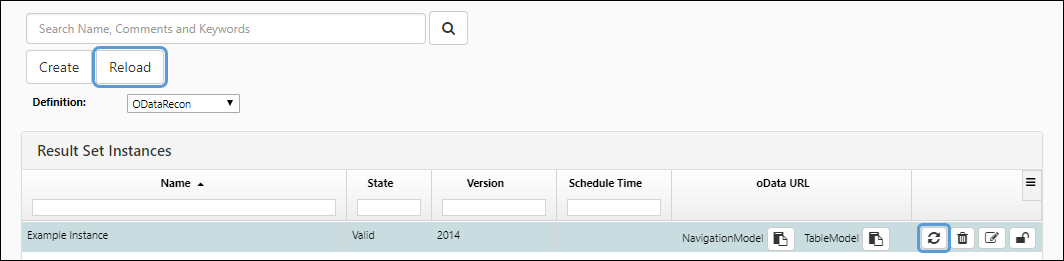
Use the Instances page to manage your result set instances. In addition to creating and deleting result set instances, use this page to reload the data in your result sets, and retrieve your instances' OData feed URLs.
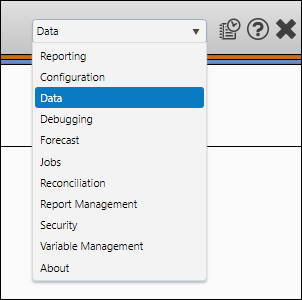
- Select Data from the Navigation Toolbar.
- Click on the Result Set tab, and then the Instances page.
Create a Result Set Instance
To create a result set instance, follow these steps:
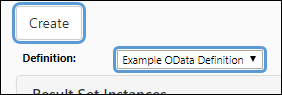
- Select the result set definition you wish to create an instance of (instantiate) using the Definition drop-down menu.
- Click the Create button.
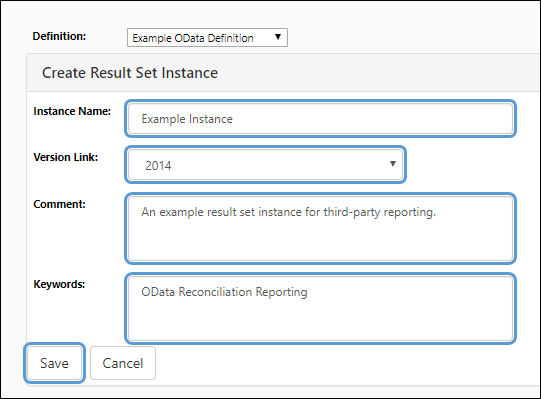
- Set up your instance's options:
- Enter a name for your instance in the Instance Name field.
- Select the version of your data that will be added to your result set instance using the Version drop-down menu.
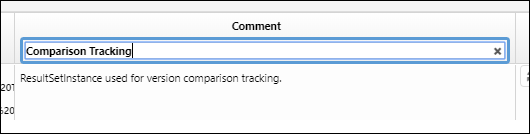
- (Optional) Enter a description of your instance in the Comment field.
- When you’ve finished setting up your instance, click the Save button.
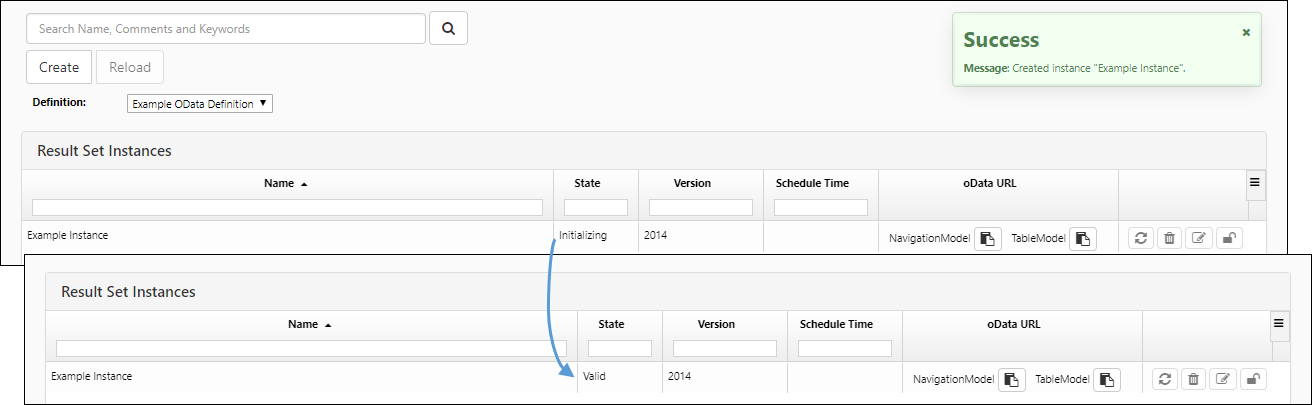
- Your new instance will be listed in the Result Set Instances table.
- After the instance has been populated with data, its state will change to Valid.
Click image to expand or minimize.
Click image to expand or minimize.
Reload the Data in a Result Set Instance
To reload the data in a result set instance, click the Reload ( ) icon in its row, or select its row and then click the Reload button near the top of the screen.
Click image to expand or minimize.
The instance's state will change, and the loader assigned to the instance's definition will run. You can monitor the progress of the loader on the The Job Results Page. When the loader is complete, the instance's state will change to Valid.
Automatic Reloads
You also have the option to automatically reload each instance's data daily.
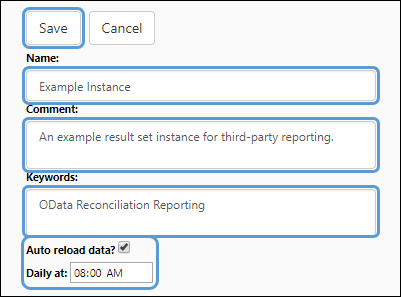
Modify an Instance's Properties (Including Automatic Reloads)
To modify an instance's properties (names, comments, keywords, automatic reload), follow these steps:
- Select the definition associated with the instance you wish to modify using the Definition drop-down menu.
- Click the Edit icon (
 ) that corresponds with the instance you wish to modify.
 - Modify your instance's properties, as required.
- To enable auto reloading, enable the Auto reload data? checkbox, and select a time using the Daily at field.
- When you've finished modifying your instance, click the Save button.
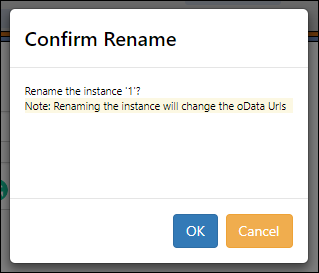
- If necessary, confirm the name change by clicking the OK button.
Click image to expand or minimize.
Click image to expand or minimize.
Delete a Result Set Instance
To delete an instance, follow these steps:
- Select the definition associated with the instance you wish to delete using the Definition drop-down menu.
- Click the Delete icon (
 ) that corresponds with the instance you wish to delete.
 - You will be prompted to confirm the deletion. Click the OK button to delete your instance.
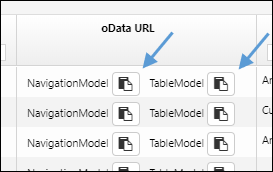
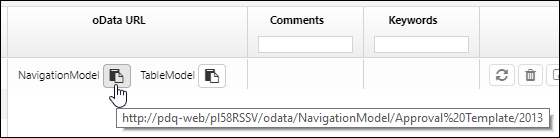
Copy a Feed URL to the Clipboard
You can copy feed URLs to the clipboard using the Copy icons ( ) in the oData URL column of the table.
Lock/Unlock a Result Set
When you lock a result set:
- You won't be able to reload its data.
- You won't be able to delete it.
- You won't be able to modify its properties.
To lock a result set, follow these steps:
- Select the definition associated with the instance you wish to lock using the Definition drop-down menu.
- Click the Lock icon (
 ) that corresponds with the instance you wish to lock.
 - You will be prompted to confirm the lock. Click OK to lock the instance.
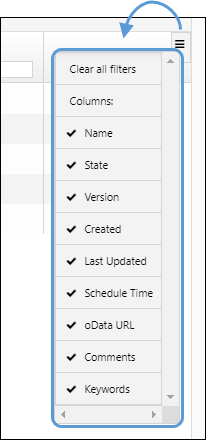
Add or Remove Columns from the Table
You can hide or display any of the columns on the Result Set Instances table. To add or remove a column from the table, follow these steps:
- Click the Filtering Options icon (
 ).
). - Click on the column you wish to add or remove from the table.
- Add columns: Columns with an "X" beside them (
 ) are not displayed in the table — clicking columns with an "X" beside them will add them to the table.
 - Remove columns: Columns with a checkmark beside them (
 ) are already in the table — clicking columns with a checkmark beside them will remove them from the table.
- Add columns: Columns with an "X" beside them (
- When you have finished selecting the columns you wish to display, click on the table to close the menu.
Click image to expand or minimize.
| Filter | Description |
|---|---|
| Name | The name of each result set. |
| State | The state of the result set. One of three states will be displayed:
|
| Version | The version the result set's data is linked to. |
| Created | The date and time when the instance was created. |
| Last Updated | The last date and time when the instance's data was updated. |
| Schedule Time | If you enable automatic reloads for an instance, the scheduled time for the reload will be listed in this column. |
| oData URL | Buttons to copy each instance's navigation and/or table OData feed URLs are included in this column. |
| Comments | The comments associated with each instance. |
| Keywords | The keywords assigned to each instance. |
Filter Values in Columns of the Result Set Instances Table
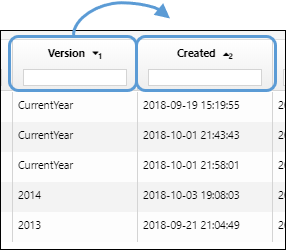
Clicking on a column title will allow you to sort the values in the column by alphabetical, numeric, or timed order (depending on the values in the column). You can apply more than one filter at a time by holding the SHIFT key on your keyboard while selecting columns. When you sort multiple columns, numbered icons will be added to the column title to indicate the order in which they are sorted. In the example below, the Run State column was sorted before the Execution Time column.
Some columns also include search fields. Use these to search for values in the table.
Third-Party Reporting
Once you've created an instance of a reporting result set, you can pass your data to Excel and Spotfire using the instance's feed URLs. For more information, see: